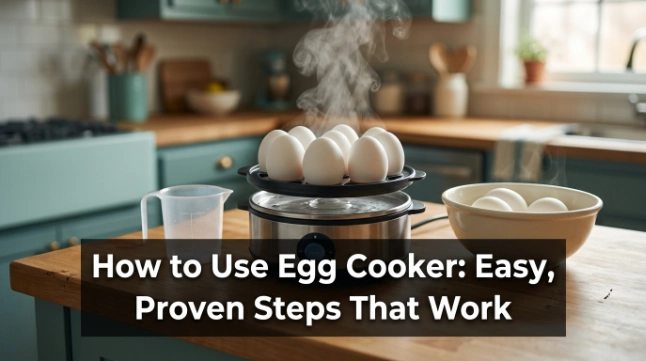
Learning how to use egg cooker machines can feel less clear than it should. Most models have only one button, yet the water marks, trays, and alarm can cause doubt.
I had the same problem the first time I worked with one. My first batch was too soft because I used too little water and lifted the lid too soon.
The good news is that the basic process is simple. In this guide, I will show you how to set up the cooker, measure the water, cook the eggs, and fix common problems.
Common Signs of the Problem
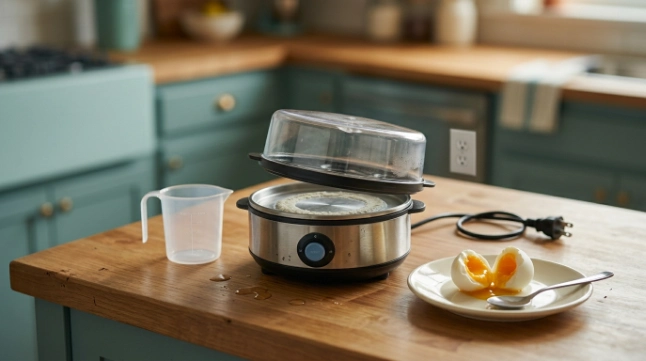
A new egg cooker may seem faulty when it is only set up the wrong way. Small errors can change the cooking time or stop the unit from heating.
Here are the most common signs I noticed during use:
- The cooker does not turn on.
- The eggs are too soft or too firm.
- Water leaks from under the lid.
- Steam escapes from the sides.
- The cooker turns off too soon.
- The alarm sounds before the eggs seem ready.
- A white or brown film forms on the heating plate.
- The unit gives off a burning smell.
Most of these signs have a simple cause. Start with the water, tray, lid, and wall outlet before you assume the cooker is broken.
| Symptom | Likely Cause | Quick Fix |
|---|---|---|
| Eggs are too soft | Too little water | Use the correct cup mark |
| Water leaks out | Tray or lid is not seated | Refit both parts |
| Cooker will not start | Power or safety switch issue | Check the outlet and tray |
| White marks appear | Mineral buildup | Descale the heating plate |
| Burning smell | Dry plate or food residue | Turn it off and inspect it |
If your measuring cup is lost, try to get the correct replacement cup for your model. Its marks are often made for that cooker and may not match a normal kitchen cup.
A cracked egg tray or lid can also affect cooking. Replacement egg trays, lids, and measuring cups are useful when the original parts no longer fit well.
Possible Causes
An egg cooker makes steam by heating a small amount of water. That steam cooks the eggs, so the amount of water has a direct effect on the result.
These are the most likely reasons an egg cooker does not work as expected:
- The wrong water level was used.
- The egg tray was fitted upside down or left loose.
- The lid was not centered.
- The steam vent was blocked.
- The heating plate was wet, dirty, or covered in scale.
- The wall outlet did not supply power.
- The power cord was damaged.
- The eggs were very large or cold.
- The wrong tray or setting was selected.
- The unit was still hot from the last batch.
Some models also have a safety switch under the tray. If the tray is not seated, the cooker may not start.
Auto shut-off is another normal feature. The unit may stop when the water is gone, even if you expect it to run for a fixed number of minutes.
How to Use Egg Cooker: Steps and Quick Fixes
The exact water marks and buttons vary by brand. Read the manual if you still have it, but the steps below work for most basic electric egg cookers.
Check the Power Source
Place the cooker on a dry, flat, heat-safe surface. Keep it away from the sink and leave open space above the steam vent.
Inspect the power cord before plugging it in. Do not use the cooker if the plug is loose, the cord is cut, or the base has been dropped in water.
Test the wall outlet with another small appliance if the cooker shows no power. Avoid overloaded extension cords because the heating element needs a steady supply.
Choose the Right Egg Tray
Use the boiling tray for eggs in their shells. Use the poaching or omelet tray only when you want to cook eggs without shells.
Place the tray flat on the base. On models with a safety switch, a loose tray may stop the heating plate from turning on.
Measure the Water
Fill the supplied cup to the mark for soft, medium, or hard eggs. Some cups also have marks for the number of eggs.
Pour the water onto the cool heating plate. Do not pour water into the electrical base, around the buttons, or near the power cord.
Water instructions differ between models. In some cookers, hard eggs need more water; in others, fewer eggs need more water because the cooker runs longer.
| Desired Result | Water Choice | What to Expect |
|---|---|---|
| Soft-boiled | Soft mark on the cup | Runny or soft yolk |
| Medium-boiled | Medium mark | Firm white, creamy yolk |
| Hard-boiled | Hard mark | Fully set yolk |
| Poached eggs | Manual’s poach mark | Soft, shell-free eggs |
Prepare the Eggs
Some egg cookers include a pin under the measuring cup. Use it only if the manual tells you to pierce the shell.
Pierce the wide end of each egg with a small hole. I find it safer to place the cup on a firm surface and press the egg down with light, even force.
The pin is sharp, so keep your fingers away from its point. Do not use cracked eggs on the boiling tray because egg white may leak onto the heating plate.
Fit the Lid and Start Cooking
Place the eggs in the tray, then fit the lid. Make sure the steam vent is open and facing away from your hands and nearby cabinets.
Press the power button or choose the required setting. Do not lift the lid while the cooker is producing steam.
Many basic models beep or switch off when the water is gone. Flashing lights may show that cooking is complete, but some models keep beeping until you unplug them.
Cool the Cooked Eggs
Switch off and unplug the cooker when the cycle ends. Lift the lid by its handle and tilt it away from your face.
Move the eggs into cold water for several minutes. This stops further cooking and can make the shells easier to peel.
Check the Water Amount if the Eggs Are Wrong
If the yolks are too soft, use slightly more water on the next batch. If they are too firm, use slightly less.
Make one small change at a time. Egg size, starting temperature, and room conditions can all affect the final texture.
| Problem | Recommended Solution | Difficulty |
|---|---|---|
| Soft yolks | Add a little more water | Easy |
| Rubbery eggs | Use less water or cool at once | Easy |
| Uneven cooking | Use similar-sized eggs | Easy |
| Steam leaks | Refit the tray and lid | Easy |
| Unit stops early | Cool it, then check the water | Easy |
Remove Mineral Buildup
A cloudy heating plate often has limescale from hard water. This layer can cause uneven heating, noise, stains, or an unpleasant smell.
For cleaning, unplug the cooker and let it cool. Add a small amount of diluted white vinegar or a maker-approved descaling solution to the plate.
Let it sit briefly, then wipe it with a soft cloth or non-abrasive sponge. Never place the electrical base in water or scrape the plate with metal.
Reset Overheat Protection
Some cookers stop if the heating plate runs dry or becomes too hot. Unplug the unit and let it cool fully before trying again.
Add the correct amount of water and refit the tray. Never bypass the safety switch or force the cooker to restart while it is hot.
Mistakes to Avoid
The biggest mistake I made was guessing the water amount. A small change in water can make a large change in the egg texture.
Avoid these common errors:
- Do not fill the cooker above its stated limit.
- Do not block the steam vent.
- Do not touch the lid or heating plate during use.
- Do not lift the lid toward your face.
- Do not immerse the base in water.
- Do not use a rough metal scrubber.
- Do not run the cooker without water.
- Do not leave cooked eggs inside for too long.
- Do not open a sealed heating unit.
Never try to repair internal wires, the heating element, or the control board yourself. Opening the base may expose live parts and can also damage its safety system.
If you smell hot plastic, see sparks, or notice smoke, unplug the cooker if it is safe to do so. Stop using it until it has been checked or replaced.
When to Replace the Egg Cooker

A stained heating plate does not always mean the cooker needs replacing. Mineral marks can often be removed with safe descaling.
Replacement is the better choice when the cord is damaged, the base leaks, or the unit repeatedly overheats. The same applies if the safety switch or auto shut-off no longer works.
| Repair Issue | Likely Cost Level | Replace Instead? |
|---|---|---|
| Lost cup or tray | Low | No |
| Cracked removable lid | Low | Usually no |
| Damaged power cord | Medium | Usually yes |
| Failed heating element | High | Yes |
| Water inside the base | High safety risk | Yes |
For a low-cost cooker, professional electrical repair may cost more than a replacement. Safety matters more than saving a unit with damaged internal parts.
My Personal Experience
My first result was inconsistent because I treated the measuring marks as a rough guide. I also used eggs of different sizes in the same batch.
I tested again with eggs of one size and used the exact hard-boiled mark. I kept the lid closed and moved the eggs into cold water as soon as the alarm sounded.
That batch cooked far more evenly. I also learned that wiping the heating plate after each use prevents old water spots from turning into thick scale.
The best lesson was to change only one thing at a time. When I changed the water, egg size, and cooling time together, I could not tell which change had helped.
Final Thoughts
The easiest way to learn how to use egg cooker machines is to follow the same order each time. Fit the tray, measure the water, add the eggs, secure the lid, and start the cycle.
Keep the vent clear and stay away from the hot steam. Cool the eggs at once if you want a steady texture and easier peeling.
If the cooker does not work well, check the outlet, water amount, tray fit, and mineral buildup first. Stop using it if you find cord damage, leaks inside the base, smoke, or a failed safety feature.
27 thoughts on “How to Use Egg Cooker: Easy, Proven Steps That Work”