
Figuring out how to clean cosori air fryer can feel a bit scary at first. You might see heavy grease buildup and worry about ruining the nice coating. I used to ignore the mess until my dinner started tasting very weird. Today, I will show you my simple steps to make it look brand new again.
Why Regular Cleaning Matters
A dirty air fryer can ruin your favorite meals very fast. Old oil residue can cause thick smoke inside your kitchen. This old food also creates an airflow blockage in your machine. Your food will not cook evenly if the air cannot move around.
You also have to think about odor removal when cooking. Old crumbs will burn over and over if you leave them. This creates a very bad smell that ruins your fresh food. A simple wash keeps your machine working safely and perfectly.
Clean tools also help protect your health and your home. Built-up grease can become a major fire hazard over time. Keeping the inside spotless ensures your machine runs smoothly. You will save money by making your machine last for years.
I like to make my daily chores much easier now. I started using simple silicone air fryer liners to catch the mess. These liners sit right in the basket and grab the dripping oil. They really help stop grease and food crumbs from sticking.
Things You Need Before Cleaning
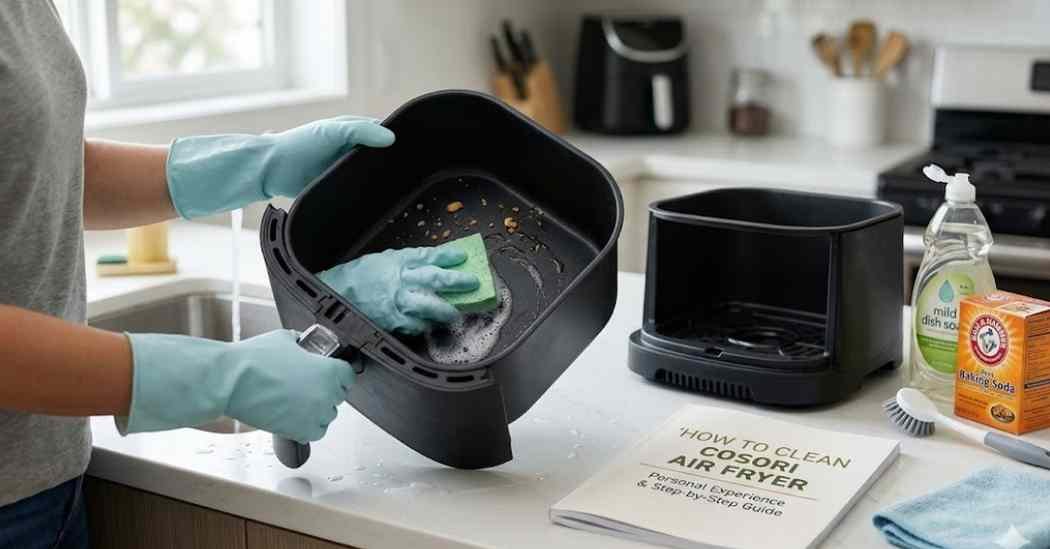
You do not need fancy tools for this deep cleaning job. You likely have everything you need sitting in your kitchen right now. Grab some mild dish soap and a very soft sponge. You will also need a clean microfiber cloth and an old toothbrush.
Never use hard metal pads on your machine parts. Those harsh tools will scratch and ruin the special coating. Soft kitchen cleaning tools are the best choice to keep it safe. Warm water is your best friend for melting away the grease.
You might also want to grab some plain baking soda. This basic powder is great for lifting very tough stains. Make sure your workspace near the sink is totally clear. Having a clean area makes the whole process feel much faster.
How To Clean Cosori Air Fryer
This is the exact method I use to clean my machine. It only takes a few minutes if you do it often. You just need to follow these simple steps in proper order. This routine will offer non-stick coating protection for your basket.
I highly recommend doing this in a well-lit kitchen. You want to see all the hidden spots where grease hides. Always take your time to avoid missing any small crumbs. Let us break down the exact steps I use every week.
Unplug and Cool Down
Always pull the plug out of the wall first for safety. You must let the machine cool down completely before you touch it. A hot machine can burn your hands very badly. Wait at least thirty minutes after you finish cooking.
Remove Basket and Tray
Proper basket cleaning starts by pulling it out of the base. Proper crisper tray maintenance begins by taking it out gently. Put these dirty parts straight into your empty kitchen sink. Do not force any parts out if they feel stuck.
Wash Removable Parts
Fill your sink with nice warm soapy water. Let the basket and tray sit in the water for ten minutes. Use your non-abrasive sponges to wipe away the loose food. Rinse everything off with fresh water until it is completely clear.
Wipe Interior Surfaces
Take a soft cloth and make it slightly damp. Wipe the inside walls of the main unit very carefully. Do not let any water drip down into the electrical parts. A quick wipe stops oil residue from turning into a sticky mess.
Clean the Heating Element
Look up inside the machine to find the metal heating coil. Next, we will focus on heating element cleaning very safely. Use a soft damp cloth to wipe the coil gently. An old toothbrush can help remove stuck food crumbs easily.
You should always do a light clean after every single meal. A fast cleaning routine stops burnt smells from building up inside. I wipe the walls down while the machine is still slightly warm. The grease comes off much faster when you do this.
Dry and Reassemble
You must dry every part completely before using it again. I use a dry towel to wipe the basket and tray. Let them sit on the counter for a little while. Push the parts back together and plug the machine back in.
Let me share a quick list of tools I always use. This guide will help you pick the right items.
| Cleaning Tool | Recommended Use |
|---|---|
| Soft Sponge | Wiping the basket and tray safely |
| Old Toothbrush | Scrubbing the heating element gently |
| Microfiber Cloth | Drying the outside and inside walls |
How To Remove Burnt Grease and Stains
Sometimes you will find burnt food residue stuck to the bottom. Regular soap might not be strong enough for these tough spots. I like to use a simple baking soda paste for this. Mix plain baking soda with a few drops of water.
Rub this paste onto the thick grease buildup. Let the paste sit on the stain for twenty minutes. The paste will lift the grease right off the metal. Wash the area with warm water and dry it well.
You can also use a gentle vinegar solution for hard stains. Mix equal parts of white vinegar and plain warm water. Spray this mix on the stubborn spots and wait five minutes. Wipe the area clean and the bad smells will vanish.
Dishwasher Safety
Many people ask about dishwasher safety for their parts. Most removable parts are marked as safe for the top rack. You should always read your manual to be totally sure. I prefer to wash my parts by hand to stay safe.
Hot dishwasher water can slowly wear down the non-stick parts. Hand washing is much more gentle on the special surface. If you must use the dishwasher, skip the hot drying cycle. This small change will make your machine last much longer.
I learned that the intense heat can warp the plastic over time. Hand washing only takes about three extra minutes of your day. It is a very small price to pay for a perfect machine. Protect your investment by treating the parts with great care.
Here is how I wash different parts of my machine. This keeps everything safe and working right.
| Air Fryer Part | Best Cleaning Method |
|---|---|
| Main Basket | Warm soapy water in the sink |
| Crisper Tray | Soak in water, use soft sponge |
| Base Unit | Wipe with a damp soft cloth |
What Not To Use While Cleaning
You can easily ruin your machine if you use the wrong things. Never use harsh chemical degreasers inside the food area. These strong sprays can leave a toxic smell on your meals. Stick to safe kitchen soap and plain baking soda.
Do not use sharp knives to scrape off burnt food. Metal tools will scratch the basket and ruin the smooth finish. Never put the main electronic base into any deep water. This will break the machine and create a huge fire hazard.
Avoid using stiff scrub brushes on the cooking basket. Even rough paper towels can leave tiny scratches on the surface. Always check your tools by feeling them with your hand first. If a tool feels rough to you, it is too rough for the machine.
How Often You Should Clean an Air Fryer
You really need to wash the basket after every single use. Even a small amount of oil will smell bad the next day. A quick wash stops large messes from forming later. Regular maintenance takes only two minutes of your daily time.
I do a deep cleaning about once every month. This is when I check the heating coil and wipe the inside. If you cook very fatty foods, you might need to check it more. Staying on top of it makes the whole job very easy.
A good rule is to trust your nose before you cook. If you smell old food, it is time for a wash. Keeping up with this schedule helps with smoke prevention. A tidy machine will always give you the crispiest food.
Sometimes you might run into a few small issues. Here is how I fix the most common problems.
| Problem | Cause | Cleaning Method |
|---|---|---|
| White Smoke | Excess grease | Wash the basket and tray |
| Bad Smell | Old food crumbs | Wipe the heating element |
| Sticky Basket | Burnt cooking spray | Soak in baking soda paste |
My Personal Experience
I used to hate washing my kitchen gadgets after a long day. I let my machine sit dirty for a whole week once. The next time I cooked, my food tasted like old burnt oil. That mistake taught me to always wipe it down right away.
I found that soaking the basket makes everything so much easier. I just add hot water and eat my dinner while it sits. By the time I am done eating, the mess wipes right off. This simple habit changed how I use my cooking tools entirely.
I also stopped using heavy aerosol cooking sprays in my machine. Those sprays leave a very sticky film that is hard to wash. I now use a small brush to put plain oil on my food. This tiny switch cut my scrubbing time completely in half.
Final Thoughts
Keeping your kitchen tools spotless does not have to be hard work. A quick wash stops bad smells and keeps your food tasting great. Just remember to be gentle and use very soft sponges. Your machine will cook perfect meals for a very long time.
Always let the parts dry completely before you put them away. Try using a parchment liner if you want to skip the heavy scrubbing step. Take good care of your machine and it will take care of you. You will feel proud of your clean and shiny kitchen space.
Thank you for reading about my daily kitchen habits today. I hope these simple steps help you enjoy your meals more. Clean tools really do make cooking much more fun and safe. Happy cooking and enjoy your crispy and delicious fresh food!