
I love using my air fryer for quick daily meals. Figuring out how to clean a Cuisinart air fryer took time. Now I want to share my simple steps with you.
I used to deal with nasty grease buildup and smells. My food even tasted weird because of old oil residue. You can fix these issues easily with my simple advice.
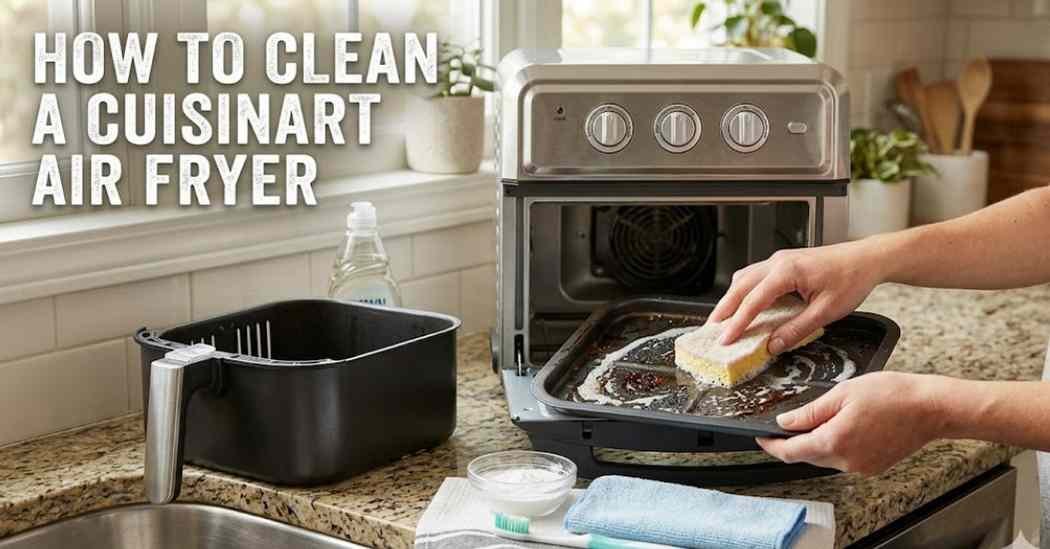
Today I will show you my exact steps for deep cleaning. You will learn how to protect the non-stick coating safely. Let us get your kitchen tool looking brand new again.
Why Regular Cleaning Matters
A dirty machine can ruin your daily cooking experience quickly. I noticed that using air fryer liners helped reduce grease buildup inside the basket. This simple trick makes regular maintenance so much easier for me.
Thick grease can also cause a major airflow blockage inside. Smoke prevention is another big reason to wash it often. A clean machine is always much safer to use at home.
Things You Need Before Cleaning
You do not need harsh chemicals for this easy job. Simple kitchen items work best for daily crisper tray maintenance. Grab these basics before you start wiping down your appliance.
- Warm soapy water
- Soft non-abrasive sponges
- Baking soda powder
- White cooking vinegar
- A soft microfiber cloth
- Small soft bristle brushes
Using the right items protects your appliance from bad scratches. Hard scrubbers will easily peel away the delicate non-stick layers. Always stick to gentle items for the best possible results.
How To Clean a Cuisinart Air Fryer
Learning how to clean a Cuisinart air fryer is very easy. You just need to follow a few simple steps every time. Let me walk you through my exact daily washing routine.
Unplug and Cool Down
You must always unplug your machine from the wall first. Safety should always be your top priority in the kitchen. Let the whole unit cool down completely before touching it.
Remove Basket and Tray
Next, pull out the basket and the inner crisper tray. Place these dirty parts gently inside your empty kitchen sink. Removing them gives you full access to the messy interior.
Wash Removable Parts
Fill your sink with warm soapy water for basket cleaning. Let the parts soak if they have hard burnt food residue. I use a soft sponge to wipe away the greasy mess.
Wipe Interior Surfaces
Grab a damp soft cloth to wipe the inside walls. Never pour water directly into the main electrical unit itself. Gently rub away any oil spots you see on the sides.
Clean the Heating Element
Look up inside the unit to find the metal heating element. Turn the machine upside down if that is easier for you. Use a slightly damp cloth to wipe away splattered oil.
Dry and Reassemble
You must dry every single part completely before putting them back. I like to use a clean microfiber towel for this step. Slide the clean basket back in once everything is fully dry.
How To Remove Burnt Grease and Stains
Sometimes regular soap is just not enough for tough spots. You might need a stronger method for a deep clean using specialized kitchen tools. I like to use a soft brush meant for cleaning delicate cookware along with baking soda.
Wait about twenty minutes before wiping the thick paste away. The baking soda lifts the burnt grease without causing any scratches. This safe trick works like magic on stubborn oil marks.
Never use metal tools to scrape away hard burnt food. You will ruin the non-stick finish permanently if you do. Your appliance will look perfectly brand new after this gentle treatment.
| Problem | Cause | Cleaning Method |
| White smoke | Excess oil buildup | Wipe inside walls |
| Bad smell | Old food crumbs | Wash basket fully |
| Sticky tray | Burnt grease spots | Baking soda paste |
Dishwasher Safety
Many people wonder if they can use their automatic dishwasher. Cuisinart says some removable parts are actually safe for dishwashers. However, I prefer to wash my basket and tray by hand.
The harsh heat of a dishwasher can degrade the finish quickly. Strong detergents might also dull the nice look of the parts. Always check your specific user manual to be completely sure.
I noticed my parts stayed looking new much longer with hand washing. It only takes a few extra minutes at the kitchen sink. Trust me, gentle soap and water is the best choice.
| Air Fryer Part | Best Cleaning Method |
| Outer Shell | Damp soft cloth |
| Main Basket | Warm soapy water |
| Heating Coil | Dry small brush |
What Not To Use While Cleaning
You must avoid using harsh wire brushes on your machine. These will scratch the delicate surface right away and cause rust. Stick to items that feel soft against your bare hands.
Never submerge the main base unit into your sink water. This part holds all the dangerous electrical wires and computer chips. Always use a damp cloth when wiping the main outer body.
Do not use heavy degreasers meant for car engines or grills. These strong toxic chemicals are not safe around your daily food. Natural items like vinegar are much safer for regular kitchen use.
How Often You Should Clean an Air Fryer
I highly suggest doing a light wipe down after every single use. This stops the daily oil drops from turning into hard stains. This simple habit keeps your machine ready for the next meal.
You should plan a deep cleaning session at least once a month. Daily use creates hidden grease splatters that you might easily miss. A monthly check ensures perfect performance and total odor removal.
If you cook highly greasy foods like bacon, wash it immediately. Fat hardens very quickly once the hot machine cools down completely. Stay on top of it to enjoy fresh tasting food always.
My Personal Experience
When I first bought my unit, I never washed it right. Eventually, my kitchen filled with awful white smoke during dinner prep. That scary moment forced me to change my lazy maintenance habits.
Now I keep a dedicated soft sponge just for this appliance. I also found that warm water works much better than cold water. My meals taste much better now that the basket is fresh.
Taking care of this machine truly saves me a lot of money. It still works exactly like it did on day one. I hope my simple tips help you avoid my early beginner mistakes.
| Cleaning Tool | Recommended Use |
| Microfiber Cloth | Drying wet parts |
| Soft Sponge | Daily hand washing |
| Old Toothbrush | Scrubbing tight corners |
Final Thoughts
Keeping your favorite cooking gadget fresh does not have to be hard. A quick daily wipe makes a huge difference in food quality. You now know exactly how to tackle those tough grease spots.
Use natural items like baking soda to keep things safe and simple. Always unplug your device before you start any maintenance routine. Enjoy your crispy food without any of the bad burnt smells.
Thank you for reading about my personal kitchen maintenance journey today. Grab your soft sponge and give your machine some much needed love. Happy cooking and enjoy your spotless home appliance every single day.