
The first time I used an electric egg cooker, I was not sure which end of the egg I should pierce. The measuring cup had a tiny pin on the bottom, but the instructions were not very clear.
If you are wondering where to pierce eggs for egg cooker use, the simple answer is the large, rounded end of the egg. That end normally contains the egg’s small air pocket.
Piercing that end can give expanding air and steam a place to escape. This may lower the chance of the shell cracking while the egg heats.
I have also learned one important lesson from testing different cookers: always check your own model’s instructions first. Some egg cookers recommend piercing, while others may not require it.
Common Signs of the Problem
Piercing an egg sounds simple, but doing it in the wrong place can create a surprising mess. I learned this after puncturing the pointed end of one egg during an early test.
A little egg white leaked through the hole as soon as the cooker warmed up. It cooked onto the tray and made cleanup much harder than it needed to be.
Here are the most common signs that something is wrong:
| Symptom | Likely Cause | Quick Fix |
|---|---|---|
| Egg white leaks out | Hole is too large or in wrong end | Pierce only the rounded end |
| Shell cracks during cooking | Air pressure or damaged shell | Use a tiny hole and inspect shell |
| Egg tips or leaks in tray | Egg placed incorrectly | Follow tray orientation |
| Piercing pin breaks shell | Too much pressure | Press gently and slowly |
| Eggs cook fine without holes | Model may not require piercing | Check the cooker manual |
If several eggs crack at once, piercing may not be the only cause. Too much water, damaged eggs, or sudden temperature changes can also contribute.
Possible Causes
The biggest cause of trouble is simply misunderstanding which side of the egg contains the air cell. The air cell is normally at the wide or rounded end, not the narrow pointed end.
Another common mistake is making the hole too deep. You only need to puncture the shell. You are not trying to push the pin far into the egg.
Other possible causes include:
- Piercing the pointed end instead of the rounded end.
- Pressing the piercing pin too hard.
- Using an egg that already has a hairline crack.
- Making several holes instead of one small hole.
- Using the wrong side of the egg tray.
- Adding more water than the cooker requires.
- Ignoring instructions that are specific to your egg cooker model.
The piercing tool is often built into the bottom of the water measuring cup. On my cooker, this was easy to miss because it looked like a small plastic point rather than a separate tool.
If your original cup is lost or its piercing pin is damaged, a compatible replacement measuring cup can be useful. I prefer using the correct cup because its water markings and piercing tip are made for egg cooker use.
How to Fix Confusion About Where to Pierce Eggs for Egg Cooker
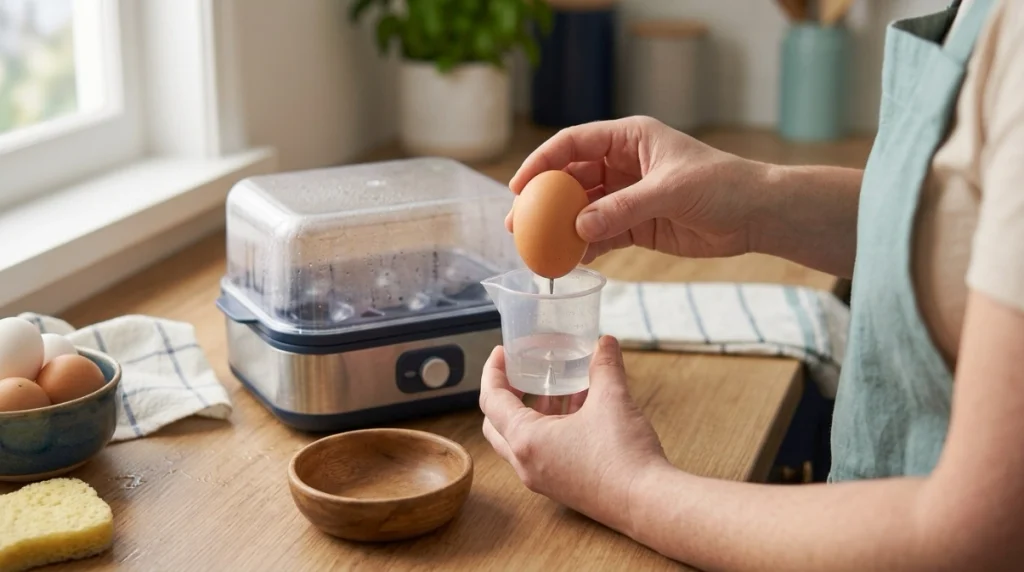
Find the Rounded End of the Egg
Hold the egg in your hand and compare both ends. One side should look narrower and more pointed.
The other side will look wider and more rounded. That is normally the end you should pierce when your egg cooker instructions call for a pierced shell.
I find it easier to identify the correct end before placing any eggs into the tray. This prevents me from rushing once the cooker is filled.
Make One Small Hole
Place the rounded end gently against the piercing pin. Apply only enough pressure to make a tiny hole in the shell.
You do not need a large opening. In my tests, a very small puncture worked better because it allowed pressure to escape without giving egg white much room to leak.
If the shell starts to crack around the hole, stop. Use another egg rather than cooking one with a badly damaged shell.
Check Your Measuring Cup
Many egg cookers include a water cup with a sharp egg-piercing pin built into its base. Turn the cup over and inspect it carefully.
The pin can be surprisingly sharp. I now hold the cup by its sides and keep my fingers away from the bottom whenever I take it from the drawer.
| Problem | Recommended Solution | Difficulty |
|---|---|---|
| Cannot find piercing tool | Check bottom of measuring cup | Easy |
| Piercer is missing | Use compatible replacement cup | Easy |
| Hole keeps cracking shell | Use less hand pressure | Easy |
| Egg leaks after piercing | Make a smaller hole | Easy |
| Unsure if piercing is needed | Read model instructions | Easy |
Never use a large knife to pierce an egg. A proper egg piercer or the small pin supplied with the cooker gives you much better control.
Put the Egg in the Tray Correctly
After piercing, place the egg into the egg tray as directed by your cooker manual. Tray designs are not all the same.
Many models hold eggs upright, but the exact orientation can vary. I avoid assuming that every cooker works like my own.
A stable egg is less likely to move, knock against another egg, or leak during cooking.
Measure the Water Carefully
Piercing the right end will not fix eggs that are being cooked with the wrong amount of water. Most compact egg cookers use water quantity to control cooking time.
Use the markings for soft, medium, or hard eggs if your measuring cup provides them. I noticed much more consistent results once I stopped guessing the water level.
Also make sure the heating plate is cool before adding water.
Keep the Piercing Tool Clean
A dried bit of egg white can collect around the piercing pin if an egg leaks. I give the cup and piercing area a quick clean after each messy batch.
Use a soft cloth or non-abrasive sponge. Avoid scraping plastic parts with knives or harsh metal pads.
For the heating plate, follow your manufacturer’s cleaning directions. Mineral marks may appear over time, but they are separate from the question of where the egg should be pierced.
Check the Lid and Steam Vent
The lid and steam vent also need to stay in their proper position. Steam must be able to leave the cooker safely.
Do not block the steam vent in an attempt to cook eggs faster. Hot steam can cause serious burns.
I keep my hands away from the vent while the cooker is running and wait until the unit has cooled before lifting the lid.
Mistakes to Avoid
The most common mistake I made was thinking the pointed end looked like the natural place to pierce. It is actually the rounded end that normally contains the air pocket.
Another mistake is pushing the piercing pin too deeply. A tiny puncture is enough.
Avoid these errors:
- Do not make a large hole.
- Do not pierce both ends unless your manual specifically says to.
- Do not pierce an egg while it is hot.
- Do not hold the egg in your palm while pushing a sharp loose pin toward your hand.
- Do not use eggs with obvious cracks.
- Do not block the steam vent.
- Do not open or modify the cooker heating unit.
- Do not bypass switches or safety features.
Steam is one of the bigger risks with an egg cooker. When cooking ends, open the lid away from your face and hands.
I also unplug my cooker before wiping the heating plate. Water and electrical parts should always be kept separate.
When to Replace the Egg Cooker
A mistake with egg piercing usually does not mean you need a new egg cooker. Most problems can be solved by correcting the piercing method, water level, or egg position.
Replacement becomes more reasonable when the cooker itself has an electrical or heating problem.
| Repair Issue | What I Would Do | Replace Instead? |
|---|---|---|
| Missing measuring cup | Buy compatible cup | No |
| Damaged egg tray | Replace tray if available | Usually no |
| Cracked lid | Replace compatible lid | Maybe |
| Cooker will not heat | Stop using and inspect safely | Often |
| Burning electrical smell | Unplug immediately | Yes |
| Damaged power cord | Stop using | Usually yes |
I would not open a sealed heating base to attempt an electrical repair. For an inexpensive countertop egg cooker, professional repair can cost more than replacing the appliance.
A burning smell, melted plastic, sparking, or damaged cord is also a reason to stop using the cooker immediately.
My Personal Experience
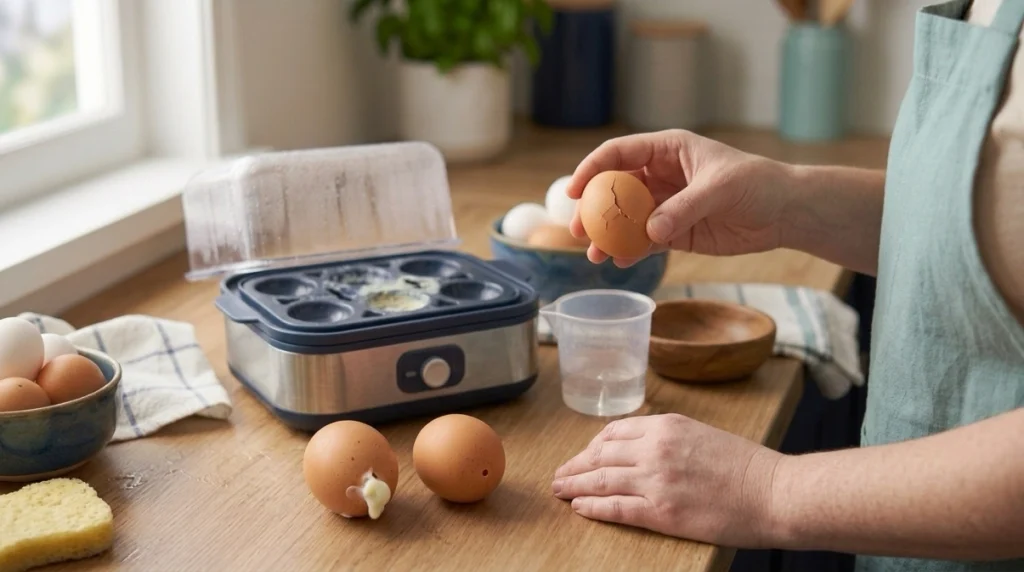
My first few batches taught me more than the short instruction booklet did. At first, I pierced one egg at the narrow end and another at the rounded end to compare them.
The egg pierced at the narrow end leaked a little white onto the tray. The one pierced at the rounded end stayed much cleaner.
On my next batch, I used only a tiny hole in the broad end of each egg. I also measured the water carefully instead of filling the cooker by eye.
That combination gave me the most reliable result. The shells stayed intact, the eggs cooked evenly, and I had much less residue to wipe away afterward.
I also learned not to blame every cracked shell on the piercing method. One egg cracked even though I pierced it correctly.
When I looked closely, that egg already had a fine crack near the middle of the shell. Since then, I inspect each egg before putting it into the cooker.
The best lesson for me was simple: use the rounded end, make the smallest hole you can, and follow the instructions that came with your specific cooker.
Final Thoughts
So, where to pierce eggs for egg cooker use? If your cooker requires egg piercing, make one small hole in the wide, rounded end of the egg, where the air cell normally sits.
Use the built-in piercer on the measuring cup when available. Press gently, inspect eggs for cracks, measure the correct amount of water, and keep your hands away from hot steam.
Most importantly, check your cooker’s manual because not every design uses the same method. Once I stopped guessing and used a tiny hole in the rounded end, my batches became much cleaner and more consistent.