
Do you have to pierce eggs for an egg cooker? Not always. Some egg cookers need a small hole in the wide end of each egg. Others tell you not to pierce the shell.
I learned this after cracking several eggs in my cooker. I thought piercing was a rule for every model. It is not. The right choice depends on the cooker and its instructions.
In this guide, I will explain when to pierce eggs, how to do it safely, and what to try if your eggs crack or leak.
Common Signs of the Problem
You may be unsure about piercing eggs because your last batch did not cook well. The shells may crack, or egg white may leak onto the heating plate.
I also noticed that some eggs developed a deep dent at the wide end. A few were hard to peel. These issues made me test both pierced and unpierced eggs.
| Symptom | Likely cause | Quick fix |
|---|---|---|
| Shell cracks while cooking | Cold egg or too much steam | Let eggs warm slightly |
| White leaks from the hole | Hole is too large or too deep | Make one tiny hole |
| Egg does not cook evenly | Wrong water amount | Use the marked cup |
| Egg is hard to peel | Egg is very fresh | Cool it in ice water |
| Egg pops in the cooker | Pressure inside the shell | Pierce only if instructed |
A small shell crack is not always dangerous. Still, leaked egg white can burn onto the hot plate and create a bad smell.
If your cooker came with a water measuring cup, check its base. Many cups have a small piercing pin hidden underneath.
That pin is useful when the manual tells you to pierce the eggs. If it is lost or damaged, a replacement measuring cup made for your model is safer than a large sewing needle.
Possible Causes
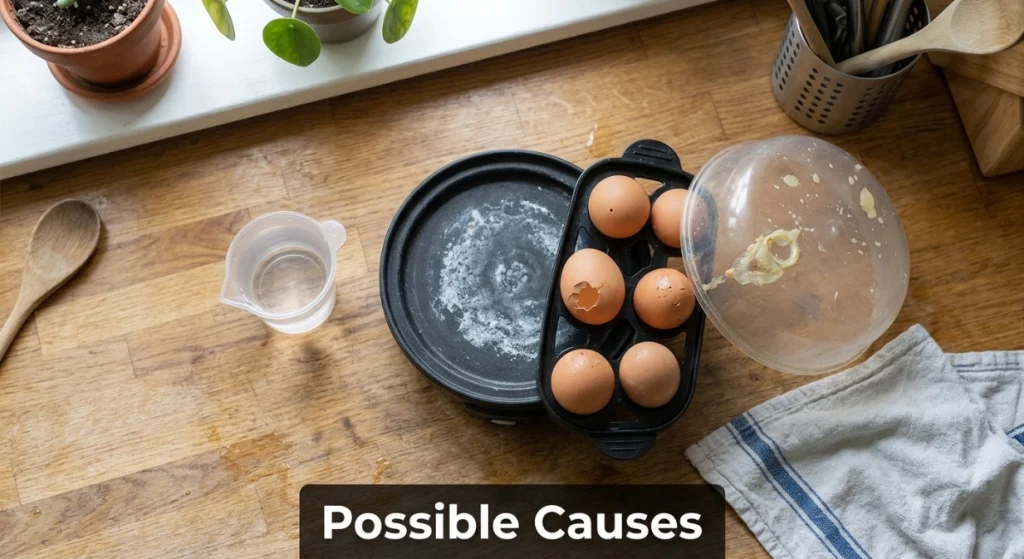
The question is not only about the egg. The cooker design also matters. Different models use different amounts of steam and heat.
Here are the most common reasons eggs crack or cook poorly:
- The manual requires piercing, but the eggs were left whole.
- The egg was pierced at the narrow end.
- The hole was too large.
- The pin went too far into the egg.
- The eggs were very cold.
- Too much water was added.
- The egg tray was not seated well.
- The lid or steam vent was blocked.
- The shell already had a fine crack.
- Mineral buildup changed how the plate heated.
Piercing can release a little air from the pocket inside the wide end. As the egg heats, that air expands. A tiny hole may reduce pressure in cookers designed for this method.
However, some modern egg cookers are made to cook unpierced eggs. Piercing those eggs may only cause leaks. This is why the manual must come first.
How to Fix: Do You Have to Pierce Eggs for an Egg Cooker?
The safest answer is simple: pierce the egg only when the maker tells you to do so. Do not use a general rule for every cooker.
Check the Egg Cooker Manual
Look for a section called “Before Use,” “Boiling Eggs,” or “Egg Preparation.” It should say if the shell needs a hole.
If the manual says to pierce each egg, follow that step. If it does not mention piercing, leave the eggs whole for your first test.
Lost the manual? Search for the exact model number on the maker’s official website. The model number is often printed under the cooker.
Pierce the Correct End
If piercing is required, make the hole in the wide end of the egg. This end holds the small air pocket.
Place the egg in the tray with the pierced end facing up unless your manual says otherwise. Keeping the hole upright helps stop raw egg white from leaking out.
Hold the egg with care. Press the supplied pin into the shell with light force. The goal is to break the shell, not push deep into the egg.
Make a Tiny Hole
A large hole does not work better. In my first attempt, I pressed too hard. The hole became wide, and egg white leaked through it as soon as the cooker heated.
A tiny pinhole worked much better. I stopped pressing as soon as the pin broke through the shell.
| Problem | Recommended solution | Difficulty |
|---|---|---|
| Hole leaks egg white | Use less pressure | Easy |
| Shell breaks in your hand | Support it with a towel | Easy |
| Pin is dull or rusty | Replace the measuring cup | Easy |
| Eggs still crack | Adjust water and temperature | Easy |
| Cooker heats unevenly | Descale the heating plate | Moderate |
Do not use a dirty pin. Wash the supplied piercing tool before and after it touches the shell.
Check the Water Amount
Water controls the cooking time in many basic egg cookers. More water often means a longer cooking cycle, but markings vary by model.
Use the cup supplied with the unit. Match the water line to the number of eggs and the result you want, such as soft, medium, or hard.
Do not guess the amount. Too much water can create a longer, hotter cycle. Too little may leave the center undercooked.
Use Eggs That Are Not Ice-Cold
A sudden rise in temperature can stress the shell. I had more cracks when I moved eggs straight from a cold fridge into a hot cooker.
I now let the eggs sit out for about five to ten minutes while I prepare the tray. I do not leave them at room temperature for a long time.
You can also rinse very cold eggs briefly with cool or slightly warm water. Do not place them in hot water because the fast change may crack them.
Inspect the Egg Tray and Lid
Make sure the egg tray sits flat. A tilted tray can allow an egg to touch the heating plate or lid.
Check that the lid fits without force. The steam vent must stay open. Never cover it with a towel or place an object over it.
Steam needs a safe way to escape. A blocked vent may increase heat and pressure inside the cooker.
Remove Mineral Buildup
White or brown marks on the heating plate are often mineral deposits. They can cause uneven heating and make the unit harder to clean.
Unplug the cooker and let it cool. Wipe the plate with a soft cloth and a small amount of diluted white vinegar if the manual allows it.
Never pour water into the electrical base. Do not scrape the plate with a knife, steel wool, or another sharp tool.
Cool the Eggs After Cooking
When the alarm sounds or the cooker shuts off, unplug it if the manual calls for that. Lift the lid away from your face and hands.
Move the eggs into cold or ice water. Cooling stops the cooking process and often makes the shells easier to peel.
Piercing alone does not guarantee easy peeling. Egg age, cooking time, and fast cooling can all affect the result.
Mistakes to Avoid
The biggest mistake is piercing every egg without checking the instructions. Egg cookers do not all work in the same way.
Avoid these common errors:
- Do not pierce the narrow end.
- Do not make several holes.
- Do not push the pin deep into the egg.
- Do not use a rusty or dirty needle.
- Do not hold the egg against your palm while pressing hard.
- Do not block the lid’s steam vent.
- Do not touch the heating plate while it is hot.
- Do not lift the lid toward your face.
- Do not open the electrical base.
- Do not bypass a safety switch or auto shut-off.
The piercing pin can be sharp. Some measuring cups have a cap to cover it. Replace that cap after use and store the cup where children cannot reach it.
If you smell burning, see smoke, or notice melted plastic, unplug the cooker. Let it cool before checking for spilled egg or other damage.
When to Replace the Egg Cooker
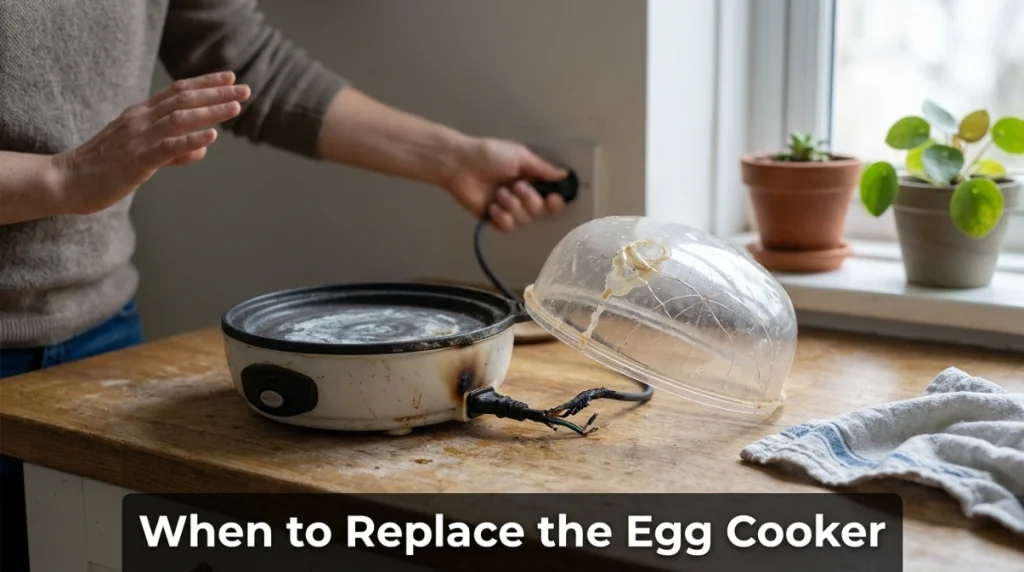
A cracked egg does not mean the cooker is broken. First, test a new batch with the correct water level and undamaged eggs.
Replacement may make sense when the cooker has an electrical fault or no longer controls heat safely.
| Repair issue | Likely cost | Replace instead? |
|---|---|---|
| Lost measuring cup | Low | No |
| Damaged egg tray | Low | Usually no |
| Cracked lid | Low to moderate | If no safe part fits |
| Failed shut-off | High or uncertain | Yes |
| Burning cord or base | Unsafe to repair at home | Yes |
Stop using the unit if the cord is damaged, the base leaks, or the heating plate stays on after the cycle ends.
Sealed heating units are not safe beginner repair jobs. Do not open the base or attempt to change its wiring.
My Personal Experience
My first cooker had a pin under its measuring cup. I assumed every egg needed a hole, so I pierced the shells without reading the guide.
I made the holes too deep. Two eggs leaked, and the white cooked onto the plate. The smell was worse than the actual problem.
For my next test, I read the instructions. I pierced only the wide end and used very light pressure. I also placed that end upright in the tray.
Those eggs cooked without leaking. I then tested unpierced eggs in a cooker whose manual did not call for holes. They also cooked well.
The main lesson was clear. The cooker’s design matters more than a general rule. Piercing helped in one unit but was not needed in the other.
I also found that the water level made a bigger difference than expected. Once I used the correct line on the cup, the eggs became much more consistent.
Final Thoughts
So, do you have to pierce eggs for an egg cooker? Only if the instructions for your model say to do it.
When piercing is required, make one tiny hole in the wide end. Use the supplied pin, keep the hole facing up, and measure the water with care.
If eggs still crack, check their temperature, the tray position, the steam vent, and the heating plate. These simple checks usually solve the problem.
Above all, protect your hands from the pin, hot plate, and steam. Never open the electrical base or bypass a safety feature.