I love making a fresh smoothie every single morning. It wakes me up and gives me a great start. Last week, I loaded up my favorite fruits and some ice.
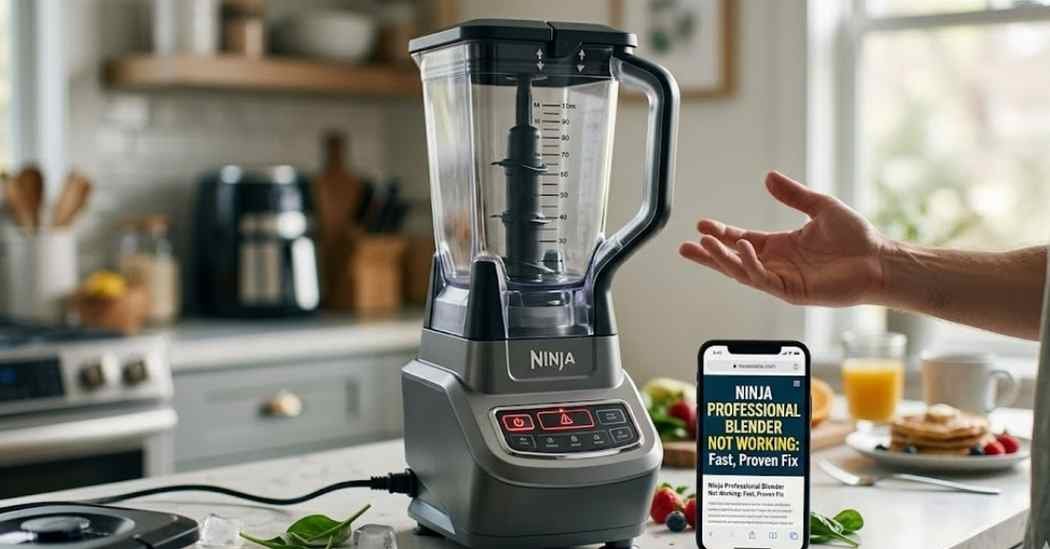
I pressed the power button, ready for my drink. Nothing happened. Having a Ninja professional blender not working is very annoying.
I felt stuck and a little bit mad. I just wanted my fast breakfast before work. I stared at the flashing lights on the control panel.
Instead of giving up, I looked closely at my machine. I tested a few simple things one by one. Soon, my favorite blender was back to life.
In this guide, I will show you exactly what I did. You will learn easy steps to fix your blender at home. You do not need any special tools or skills.
Before we dive into the steps, check your basic parts. Sometimes, old and worn parts cause the machine to fail. You might just need a new replacement blender jar or a fresh replacement lid.
If your jar leaks, a new gasket is a very cheap fix. If your ice does not crush well, replacement blades can work wonders. Keep these simple parts in mind as we go.
Common Signs of the Problem
Your blender always gives clues when it fails. You just have to watch closely for them. One of the biggest clues is a blinking red light on the front.
Sometimes, the power light simply stays totally dark. The machine might make a weird humming noise when you push a button. Or, it might smell like burning plastic.
If you see a flashing light, it usually means the parts are not lined up. The safety switch is blocking the power. It is telling you to check the setup.
If the machine is totally dead, it might be a power issue. A bad wall outlet is a very common cause. We will check all these clues together.
Possible Causes
Why does a great blender just stop working? The causes are usually very simple and easy to fix. Most issues come from how we put the parts together.
- The wall outlet has lost power or tripped.
- The power cord is bent, cut, or damaged.
- The lid locking system is not fully snapped in place.
- The white arrows on the lid and pitcher do not match.
- The motor is too hot from blending thick foods.
Sometimes, the safety switch under the jar is stuck. A tiny bit of dried food can block it. This stops the whole machine from starting.
Let us look at the most common issues and how to fix them fast. This table shows the quick fixes I use.
| Symptom | Likely Cause | Quick Fix |
| Flashing red light | Lid not locked right | Match arrows and push handle down |
| Totally dead | Bad wall outlet | Try a new plug or reset the breaker |
| Burning smell | Motor is too hot | Unplug and wait 15 minutes |
How to Fix Ninja Professional Blender Not Working
Now, let us fix the problem together. I will walk you through the very best steps. These are all beginner-friendly and super safe.
Check the Power Source
First, look closely at the wall outlet. Kitchen outlets often have a special reset button. Push the small button on the outlet to reset it.
Next, plug a small lamp into the same plug. If the lamp stays dark, the plug is bad. You will need to check your main home breaker box.
Also, check your blender power cord for damage. Look for cuts, bad bends, or exposed wires. Do not use the machine if the cord is torn.
Check the Lid Locking System
Ninja blenders are built to be very safe. They will not start if the lid is loose. This is the most common reason they stop working.
Look at the top of the lid. Find the tiny white arrow printed on it. Now, find the matching arrow on the pitcher handle.
These two arrows must point directly at each other. Press the lid down firmly onto the jar. Push the handle flat until you hear a loud click.
Reset the Overload Protection
Your blender has a hidden thermal switch inside. It stops the motor if it gets too hot. This stops fires and saves your expensive machine.
If you ran it too long, it will shut off. Unplug the blender right away. Take the pitcher off the motor base.
Wait for at least 15 minutes. This lets the hot motor cool down. After that, plug it back in and try again.
Inspect the Jar Assembly
Take a very close look at your blender jar. Make sure it sits totally flat on the base. It needs to lock into the base correctly to work.
Sometimes, sticky food gets stuck in the base holes. This stops the jar from locking down. You must keep the base clean so the safety switches can touch.
Wipe the motor base with a soft cloth. Use a food-safe degreaser if it is very sticky. Never run the electrical base under running water.
Examine the Blade Assembly
Dull blender blades make the motor work too hard. If the motor works too hard, it shuts down. Take the blades out and look at them.
Be very careful, as they can still be sharp. If the blades are chipped, you need new ones. Do not try to sharpen them yourself.
Also, check the bottom of the blade base. Make sure it spins freely by hand. If it is stiff, it will strain the main motor.
Inspect the Drive Coupling
The drive coupling is the black gear on the base. It connects the motor to the blender blades. If this gear is stripped, the blades will not spin.
Look at the gear for broken teeth. If the plastic looks chewed up, it is ruined. A bad coupling makes a very loud grinding noise.
If your coupling is bad, the motor might still hum. But nothing inside the jar will move. This part must be fixed to blend again.
Here is a quick look at these common problems and how hard they are to fix.
| Problem | Recommended Solution | Difficulty Level |
| Flashing lights | Lock lid and match arrows | Very Easy |
| Pitcher won’t lock | Wipe base and check tabs | Easy |
| Motor shut off | Let cool for 15 minutes | Very Easy |
Mistakes to Avoid
Do not ever force the lid if it is stuck. This will break the small plastic tabs. Without those tabs, the blender will never turn on.
Never try to fix a broken power cord with tape. This is a huge fire risk in the kitchen. Safety must always come first when fixing appliances.
Do not open the sealed motor base. There are no parts inside you can fix easily. Opening it will ruin your warranty and can hurt you.
Do not use abrasive sponges on the clear plastic jar. They will scratch the jar badly. Use only non-abrasive sponges and a soft cloth to wash it.
When to Replace the Blender
Some problems simply cannot be fixed at home. If the motor smokes a lot, it is fully broken. A burning electrical smell that stays means bad news.
If the main base is cracked, it is not safe to use. Small parts like seals or gaskets are cheap to swap. But a dead motor means you need a new blender.
Sometimes, buying parts costs too much. If a new pitcher and blades cost eighty dollars, think twice. A brand new blender might be a better choice.
Here is a guide on repair costs. It helps you decide what to do next.
| Repair Issue | Estimated Cost | Replace Instead? |
| Broken pitcher | $30 – $50 | No, just buy a pitcher |
| Dull blades | $20 – $30 | No, get new blades |
| Dead motor | $80+ | Yes, buy a new blender |
My Personal Experience
I spent a long time trying to fix my own blender. First, I thought the expensive motor was dead. I was almost ready to throw it away.
I checked the wall outlet and it was fine. Then, I looked at the locking lid much closer. I saw that the handle was not fully clicked down.
I had placed the lid on backward. The arrows were not lined up at all. I turned the lid around and matched the arrows up.
I pushed the handle hard, and it snapped into place. As soon as it clicked, the red light stopped flashing. The power light turned a solid white.
I pressed the main power button. The blender roared to life instantly. I made a perfect smoothie just a few minutes later.
I learned a big lesson that very day. Always check the simple things first. Do not assume the worst right away when things break.
Final Thoughts
Fixing a stubborn blender does not have to be hard. Start by checking the power cord and the wall plug. Most times, the fix takes just a few seconds.
Take your time and look at the lid safety locks. Match the arrows and listen for the click. Keep the base parts free from sticky food.
Use a soft cloth and simple cleaning brushes for daily care. A well-kept blender will last for many years of daily use.
Next time your machine acts up, just take a deep breath. Follow these easy steps one by one. You will be making great smoothies again in no time.