
I love making quick meals for my family every single day. One big question I had early on was how to preheat ninja air fryer models correctly. I used to skip this step and wonder why my meals were soft. Today, I want to share exactly what I learned from my own kitchen.
It took me a few tries to figure out the best method. I realized that a hot cooking basket makes a huge difference. Getting the cooking temperature right from the start changes everything. Let me show you my easy process so you can enjoy better cooking results.
Before we dive into the steps, let us talk about prep. I often use air fryer liners to protect my cooking basket. Silicone liners are great for keeping sticky sauces off the metal tray. They make the whole cooking process so much easier for me.
Parchment liners also work well for baked goods and light items. Just be sure never to put liners in during the preheat time. The strong airflow circulation will blow empty liners into the heating element. You only want to add them when you put your food inside.
Why Preheating Matters
Preheating is the secret to getting a great crunch on your food. When food hits a hot surface, it starts cooking right away. This fast blast of heat locks in juices and improves cooking performance. Your meats will stay tender inside and have a crispy texture outside.
If you put food in a cold basket, it warms up slowly. This slow heating can make your food soggy and very soft. Good cooking efficiency relies on reaching the right heat super fast. Taking a few extra minutes to preheat solves this common food texture problem.
When the drawer is fully hot, the heat surrounds the food fast. This seals the outer layer before the inside gets too dry. You avoid that sad, steamed taste that nobody in the house likes. I promise you will see a big change in your dinner results.
How Long It Takes To Preheat
Most machines do not take long to get hot and ready. In my experience, a standard preheat time is about three minutes. If you want a very high cooking temperature, give it five minutes. Larger ovens might need a little more time to warm up fully.
I usually set my timer for three minutes for everyday meals. This gives the heating element enough time to glow bright and hot. Your exact time may change based on your specific machine size. Check your manual once, but three minutes is a very safe guess.
Some bigger ovens have a special button just for this step. If yours does, just press it and let the machine decide. If you do not have that button, the manual timer works perfectly. It is a very flexible and forgiving cooking method overall.
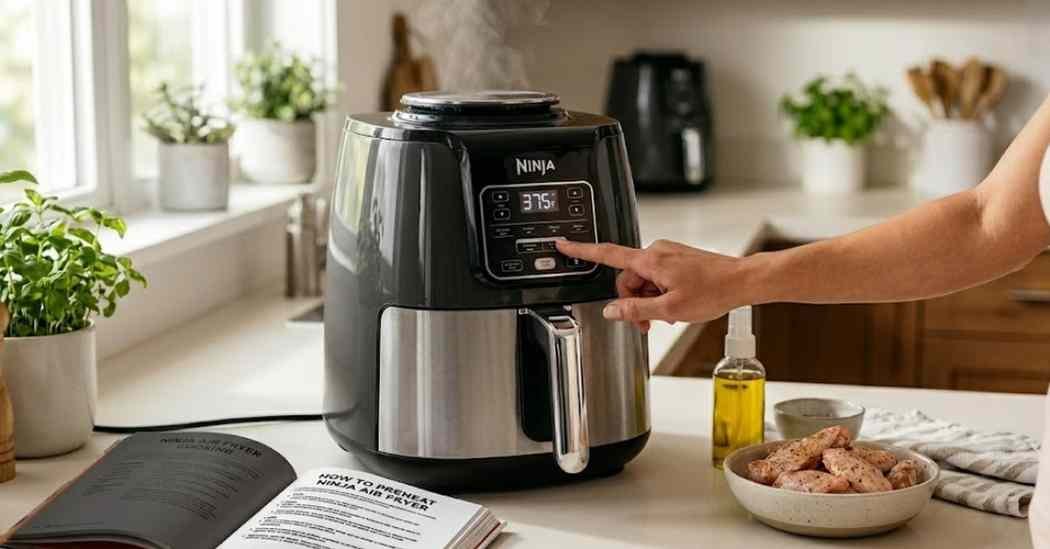
How To Preheat Ninja Air Fryer
Now we get to the main part of the cooking process. Learning how to preheat ninja air fryer units is actually very easy. You do not need any special skills to get this right. Just follow these basic steps I use in my kitchen every day.
Turn On the Air Fryer or Oven
The first step is simply plugging in your machine securely. Press the power button to turn the digital screen on. Make sure the basket is fully pushed inside the unit. The machine will not start heating if the basket is loose.
Select the Right Temperature
Next, look at your recipe to find your target heat. Use the arrows to set your exact temperature settings on the screen. It is best to preheat at the same heat you will cook with. This step ensures your food cooks evenly from start to finish.
Set the Preheat Time
Once the heat is set, you need to adjust the timer. I always drop the time down to three or four minutes. Press the start button so the machine begins to warm up. You will hear the loud fan kick on right away.
Wait for the Unit To Heat
Now you just stand back and let the machine work. The strong airflow circulation builds up heat very fast inside. Use this short time to finish seasoning your fresh meats or veggies. Do not pull the basket out while it is warming up.
Add Food After Preheating
When the timer beeps, your machine is hot and ready. Carefully pull the hot drawer out and place it on a mat. Put your food inside gently using tongs to avoid skin burns. Push the basket back in and set your actual cooking time.
Close the drawer quickly so the hot air stays trapped inside. The temperature will drop a bit when you open the cold drawer. Do not worry because it will heat right back up very fast. Your food is now on its way to a perfect crunch.
Common Preheating Mistakes
Many beginners make small errors when they first start out. One bad mistake is preheating a dirty tray full of old crumbs. I always make sure to clean the tray before I turn it on. Regular cleaning prevents old grease from burning and smoking up your kitchen.
Another mistake is leaving cooking accessories inside during the warmup. Things like oil sprayers or food thermometers should stay on the counter. Also, never leave empty parchment paper inside while the fan blows. It is a big fire hazard that you must avoid completely.
Some folks forget to use hot pads when touching the warm basket. The outside plastic stays cool, but the inside metal gets extremely hot. Always respect the heat to keep your hands safe from burns. Rushing this step is how most simple kitchen accidents happen.
I used to open the drawer constantly to check the heat. Doing this lets all the hot air escape into the room. You have to trust the machine and leave the drawer shut tight. Just wait for the timer to beep before you peek inside.
| Symptom | Possible Cause | Solution |
| White smoke blowing | Burnt food crumbs | Wash tray before use |
| Paper burning smell | Empty liner inside | Add liner with food |
| Food is very soggy | Skipped warm up | Heat for 3 minutes |
Do You Always Need To Preheat?
You might wonder if you must do this for every single meal. The honest truth is that you can skip it sometimes. Thick raw meats and fresh veggies almost always need a hot start. Baked goods also rise much better when the air is already hot.
However, some items do fine starting in a cold basket. Reheating leftover pizza or fries does not require extra prep time. Many thin frozen foods will also crisp up nicely from cold. It really depends on the final food texture you want to eat.
Thin bacon is another food I start in a cold basket. Starting cold helps the fat melt slowly without smoking up the room. You just have to learn what works best for your favorite meals. I created a simple guide to help you decide faster.
| Food Type | Recommended Temperature | Preheat Time |
| Chicken Wings | 400°F (200°C) | 3 to 4 mins |
| Baked Cookies | 325°F (160°C) | 3 mins |
| Frozen Fries | 375°F (190°C) | Not needed |
My Personal Experience
When I first bought my machine, I ignored the manual completely. I threw cold chicken inside and hoped for the absolute best. The skin turned out rubbery, and the meat took forever to cook. That was the day I finally decided to change my bad habits.
I started taking three extra minutes to warm the unit up. The very next batch of chicken came out wonderfully crisp and juicy. I noticed my cooking efficiency went way up with this tiny change. It felt like I had unlocked a secret chef trick at home.
Now, I consider this step just as important as adding salt. I even use a light spray of oil on my non-stick trays. Using the right kitchen tools makes the whole dinner routine much smoother. I am so glad I learned this lesson early on.
Sometimes I still forget this step when I am very tired. Those meals always remind me why the warm up is so important. The fries come out pale and the chicken just looks super sad. Taking a brief pause to warm up fixes all those annoying problems.
| Air Fryer Task | Preheat Recommended? |
| Cooking raw steak | Yes, always |
| Reheating cold tacos | No, skip it |
| Baking fresh muffins | Yes, always |
Final Thoughts
Learning how to warm up your machine properly changes how you cook. It takes very little effort but gives you huge flavor rewards. Your family will quickly notice how much better your dinners taste. Crisp, golden food is always just a few minutes away.
I hope my simple steps help you feel more confident today. Remember to keep your trays spotless and use safe accessories carefully. Trust the process and let the hot air do the heavy lifting. Happy cooking, and enjoy all your tasty, crunchy meals at home!