
I love making quick meals in my kitchen every single day. But soon I noticed an ugly grease buildup inside my favorite gadget. I had to figure out how to clean a Kalorik air fryer fast.
The first time I washed it, I made a few silly mistakes. I used a harsh sponge and almost ruined the non-stick coating protection. Now I want to share my easy and safe deep cleaning routine.
You will learn my exact steps for removing tricky burnt food residue. This guide will save you time and keep your appliance looking brand new. Let us get started on making your food taste fresh again.
I hate scrubbing tough oil residue after cooking a big family meal. Recently I started using simple silicone air fryer liners during my cooks. These liners catch food crumbs and make the whole process much easier.
Why Regular Cleaning Matters
Leaving old oil inside your basket causes really bad smells to form. A dirty appliance can also lead to annoying smoke prevention issues quickly. Food crumbs can cause airflow blockage and ruin your dinner completely.
Proper basket cleaning ensures your meals always taste fresh and very crisp. Regular maintenance helps your machine heat up evenly and perform much better. It also protects your investment so it lasts for many years.
When you leave burnt food, it becomes much harder to scrub off. Your heating element needs to stay clear for safe and fast cooking. A tidy kitchen gadget just makes daily meal prep so much happier.
Things You Need Before Cleaning
You do not need any fancy or expensive chemicals for this job. Basic kitchen cleaning tools are actually the safest choice for your machine. Gather your soft cloths and a few non-abrasive sponges right now.
I always keep warm soapy water and a soft cleaning brush nearby. Gentle dish soap acts as a great degreaser without harming the parts. You may also want some baking soda for stubborn spots and stains.
| Cleaning Tool | Recommended Use |
| Soft cloth | Wiping the outside casing |
| Non-abrasive sponge | Washing the basket |
| Gentle cleaning brush | Scrubbing the heating coil |
How To Clean a Kalorik Air Fryer
You might feel scared to wash an electric appliance for the first time. The good news is that the process is actually very simple. Just follow my basic routine to keep your machine safe and shiny.
You must handle the parts gently to protect the delicate non-stick finish. Never rush the process when dealing with water near electrical kitchen gadgets. Let me walk you through the exact method I use every week.
Unplug and Cool Down
You must always pull the plug out of the wall socket first. Give the machine plenty of time to cool down completely before washing. A hot machine can easily burn your hands during your wiping routine.
I usually wait about thirty minutes after I finish cooking my food. Touching hot metal parts is very dangerous and causes nasty skin burns. Safety must always come first when you start working on kitchen appliances.
Remove Basket and Tray
Pull the main basket out of the cool machine with both hands. Take out the crisper tray maintenance piece resting at the very bottom. Place these dirty parts straight into your empty kitchen sink right away.
Handling these parts carefully stops them from dropping on the hard floor. You will likely see some old oil sitting underneath the metal tray. Simply drain any extra fat into a trash can before adding water.
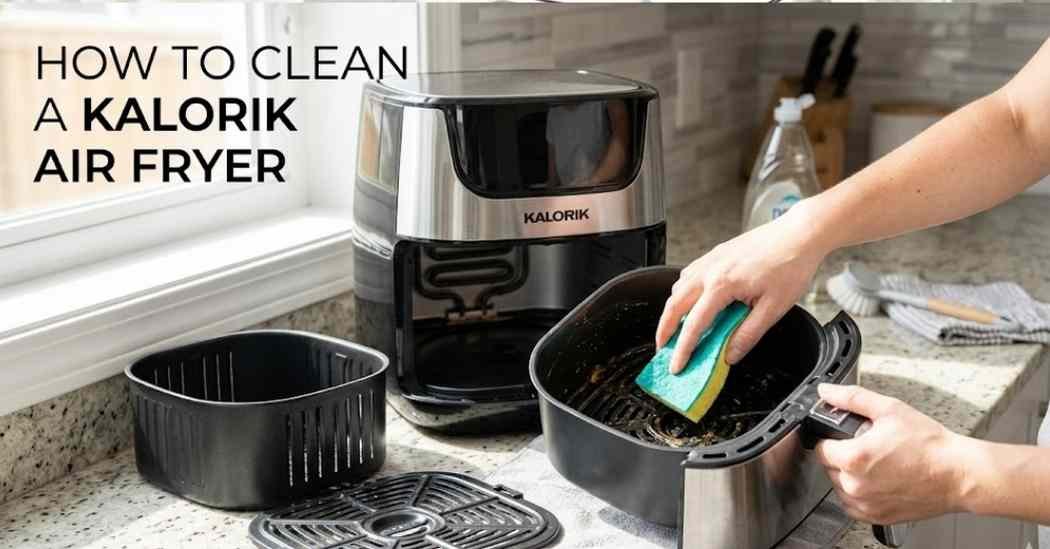
Wash Removable Parts
Fill your sink with very warm water and basic mild dish soap. Using a gentle sponge makes cleaning so much faster and way easier. Wipe the basket and the tray until they look perfectly shiny again.
Wipe Interior Surfaces
Look inside the empty machine where the drawer usually sits during cooking. Take a damp soft cloth and wipe the inner plastic walls carefully. This step helps stop odor removal problems before they even start growing.
Make sure your cloth is not dripping wet while wiping the inside. You just want to pick up any tiny crumbs left behind there. A quick wipe down stops nasty smells from blowing into your kitchen.
Sometimes oil splashes up into the roof of the main cooking chamber. A quick spray of water on your cloth helps grab this oil. Keep your cloth moving in small circles to lift the dirty spots.
Clean the Heating Element
Flip your cool machine upside down to see the metal heating coil. Use a slightly damp cloth to wipe away any old oil drops. Keeping this coil tidy is the best way to stop kitchen smoke.
If you see stuck food, use a soft brush to brush it. Never press too hard on the delicate metal coil while scrubbing it. A spotless heating coil makes your food cook evenly every single time.
A dirty element smells terrible when the machine gets hot again later. It takes just a minute to gently swipe across the metal loops. A bright and shiny element means your appliance is running perfectly well.
Dry and Reassemble
You must dry every single part before putting the machine back together. Use a clean dry towel to wipe all the water drops away. Letting things air dry for a few minutes is also a very good idea.
Slide the crisping tray back into the main bottom drawer very smoothly. Push the drawer firmly into the base until you hear a click. Plug the cord back into the wall only when you need it.
How To Remove Burnt Grease and Stains
Sometimes normal soapy water simply cannot fix a truly nasty burnt mess. I once left sticky chicken grease inside my basket for two days. The stains turned into hard rocks that would not budge at all.
I made a simple baking soda paste with a little warm water. I rubbed this thick paste right onto the worst sticky oil spots. I let it sit for twenty minutes to loosen the ugly mess.
After waiting, a soft sponge wiped the dark stains away completely easily. You can also use a simple vinegar solution for really tough spots. These gentle soaking methods work magic without scratching the vital non-stick coating.
Some people try to use sharp knives to pop off burnt crumbs. This bad habit will scratch the bottom and ruin your fancy machine. Always let the baking soda do the hard work for you instead.
| Problem | Cause | Cleaning Method |
| Sticky grease | Cooking fatty meats | Soak in warm soapy water |
| Burnt crust | Sugary sauce spills | Apply baking soda paste |
| Bad smells | Old food crumbs | Wipe inside with vinegar |
Dishwasher Safety
Many brands say their parts are fully safe for your home dishwasher. However, my manual states that hand washing is actually much better long-term. Hot dishwasher water can slowly ruin the nice dark non-stick coating protection.
Harsh dishwashing pods contain strong chemicals that eat away delicate metal finishes. Your basket might start peeling if you run it through hot cycles. I strongly prefer doing a quick sink wash to save my parts.
The high heat drying cycle in dishwashers is also very risky. It can warp the plastic handles and make the basket fit poorly. Hand washing gives you complete control over the heat and the pressure.
What Not To Use While Cleaning
You must never use harsh metal scouring pads on your delicate basket. Steel wool will scratch the sensitive surface and destroy your nice appliance. Once the coating breaks, your fresh food will stick constantly while cooking.
Do not use bleach or strong chemical bathroom sprays on kitchen items. These toxic liquids leave a harmful residue that gets into your meals. Sticking to simple dish soap keeps your family completely safe and healthy.
Never submerge the main electrical unit into your sink full of water. This terrible mistake will fry the wires and break your machine forever. Keep liquids far away from the power cord and main electrical housing.
How Often You Should Clean an Air Fryer
A light routine wipe should happen right after every single cooking session. Empty the crumbs and wash the basket to stop bugs from visiting. This fast daily habit stops massive layers of fat from forming inside.
You should schedule a proper deep cleaning session once a full month. This monthly routine tackles the heating element cleaning and all hidden walls. Regular maintenance prevents odd flavors from mixing into your new fresh meals.
| Air Fryer Part | Best Cleaning Method |
| Main basket | Wash with warm soapy water |
| Outer shell | Wipe with a damp soft cloth |
| Heating coil | Brush gently with soft bristles |
My Personal Experience
When I first bought my gadget, I was really lazy about washing. I would cook french fries and just leave the salty crumbs inside. Soon my whole kitchen smelled exactly like old stale cooking oil constantly.
I realized that poor care was totally ruining my expensive new toy. I built a fast routine that only takes three extra minutes now. Doing a proper cleaning right away saves me from doing hard scrubbing.
I also learned that shaking excess water off prevents ugly rust spots. Taking care of my machine makes cooking dinner fun and totally stress-free. Your appliance will reward you with perfect crispy meals if you care.
Final Thoughts
Washing your favorite kitchen gadget does not have to be a nightmare. Following these simple steps keeps your meals tasting absolutely wonderful every time. A tidy machine looks beautiful sitting out proudly on your kitchen counter.
You now know my secret tricks for fighting off sticky burnt stains. Just remember to use gentle tools and avoid any dangerous harsh chemicals. Enjoy cooking your next delicious family meal in your freshly spotless appliance!